These fermented okra are crunchy, dilly and loaded with healthy probiotics. Yes YOU can make your own fermented vegetables and it’s not difficult. I’ll show you how to make fermented okra!

I started making my own fermented food a couple years ago at a time when I was buying ferments from other people. You know how it goes – after a couple times buying it, you realize “I could make this myself!”
But not in an “Oops, I was wrong about that” kind of way. You guys, fermenting is so easy, and honestly really fun.
Watching those bubbling jars of lacto-fermented goodness on your counter is like science class for adults!
Here’s a video of some fermented salsa I made. The air bubbles are a great sign of successful fermentation!
Fermented okra is one of my favorites. I make this okra recipe with dill and garlic, so the okra winds up tasting just like a crunchy okra dill pickle. And I love dill pickles – what about you??
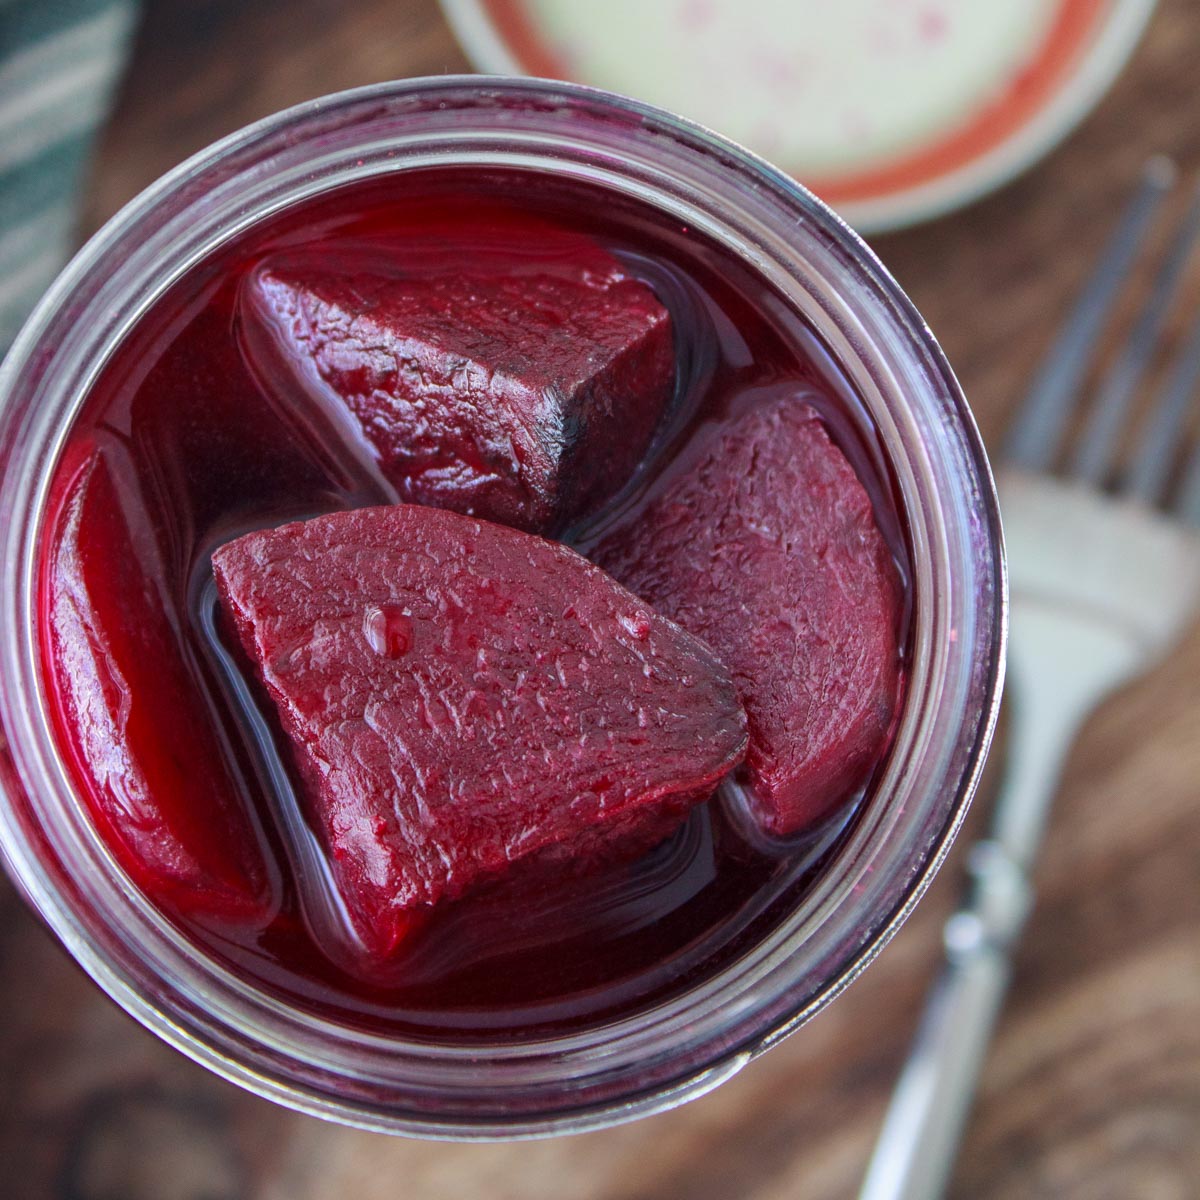
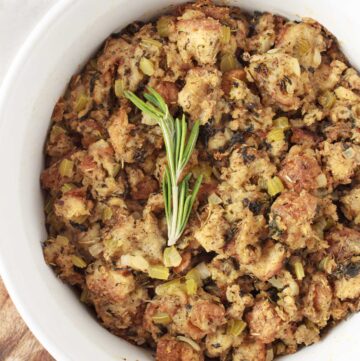
I also love making fermented salsa, sauerkraut, green beans and more!
This weekend I was able to score some fresh okra from a local farmer at the farmers market. It’s one of those rare fresh vegetables that you can find growing in south Florida this time of year.

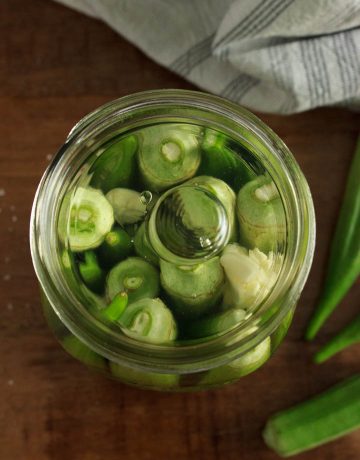
To make fermented okra you’ll be combining whole okra, fresh dill (I’ve also used freeze-dried when I didn’t have fresh), garlic cloves and some peppercorns, and letting them ferment away at room temperature for a week in a salt water brine.
Within a couple days they’ll be bubbling away.
Equipment You’ll Need to Ferment Okra
(As an Amazon affiliate I may earn a commission if you purchase these products.)
- Wide-mouth glass jar, 16 ounces
- Fermenting lid, not required, but helpful for beginners to eliminate the fear of exploding jars (I use these fermenting lids)
- Weight to keep the okra submerged in the salt brine (I use these weights, but have also used a piece of cabbage and a balled up piece of plastic wrap)

How Long Does it Take to Ferment Okra?
I ferment my okra for 8 to 10 days. The longer you ferment, the more tangy they will taste.
When you first get started, I suggest tasting a piece after 4 days to see if you like it. For me, 4 days isn’t enough to get the tangy flavor I like. But for you, it might be perfect. Keep tasting every couple days until you’re happy with the flavor.
When the fermented okra is done to your liking, just put a lid on and move it to the fridge. I’ve kept mine in the fridge for a month or two without issue.
Be mindful though that it will continue to more slowly develop in flavor (tartness) even while in your fridge. So if you keep your fermented okra in the fridge for a long time you may find you stop enjoying it as much.

Tip: Use pH sticks to determine when your fermented okra is done
Another trick for determining the doneness of ferments is to check the pH level of the brine. The longer okra ferments (or anything ferments), the lower the pH will become.
I have little pH sticks that I sometimes stick into the brine to check the level without needing to actually remove and taste a piece. For me, the sweet spot of tangy flavor is when the pH is under 3.0.
Quick Facts About Fermenting Okra
- Yes it’s normal for your brine (salt water) to get cloudy during the process of fermentation
- Yep, that white film on your veggies is normal too (it’s a type of wild yeast)
- If it bubbles over, just wipe it up
- To be safe, put your jar in a bowl in case it overflows
- Be sure your food (including the dill and other seasonings) is fully submerged in the salt water, the salt prevents bad bacteria from growing
- Because the air temperature impacts how quickly food ferments, your fermented okra will taste different each time you make it
- Food ferments faster in warmer temperatures, so you may want to start checking your ferments for flavor sooner in summer than you do in winter
FAQ about Fermented Okra
What causes air bubbles in fermentation?
During the fermentation process, yeasts and beneficial bacteria that occur naturally on the okra consume the sugars that are in the okra. As this happens, the sugars are converted to lactic acid and the bacteria and yeast release carbon dioxide as a by-product of this process.
The carbon dioxide rises to the top of the salt brine and creates the air bubbles you see. The creation of lactic acid is why this type of fermentation is called lactic acid fermentation.
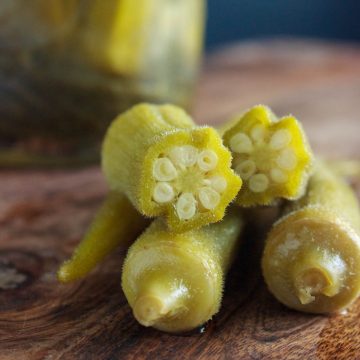
Is fermented okra slimy?
When I make fermented okra it does not have a slimy texture. When you bite into a piece of fermented okra, the inside where the seeds are might be just slightly slimy. But “crunchy” is a better word to describe the texture of fermented okra.
What can I do with fermented okra?
I enjoy fermented okra as a snack on its own, and with my lunch or dinner. Think of fermented okra like you would a dill pickle…you can slice okra pickles to put on top a sandwich, have a piece alongside your lunch, serve it on a charcuterie board and so on.
Do I need to refrigerate fermented okra?
Fermented okra needs to be kept in the fridge after the fermentation process is complete. Unlike regular pickled okra, we are not using a pressure canner or hot water bath so these okra are not shelf-stable.
What are some health benefits of fermented foods?
Before we knew about the health benefits of fermented foods, we used fermentation as an easy way to preserve food and improve flavor. Now, scientific studies have been done to investigate the health benefits of fermented foods. These studies have found that the specific peptides produced during the process of fermentation:
- Lower blood pressure
- Have prebiotic properties
- Are anti-carcinogenic, anti-oxidant and anti-microbial
Fermented foods also contain probiotics which are a type of good bacteria for gut health! If you’re interested in this topic, here is an article published by Harvard about fermented foods and the gut microbiome.
And now, step by step instructions to make this delicious recipe!
—
If you try this recipe and love it, I’d be thrilled if you gave it a 5-star rating!
Follow along on Instagram, Pinterest or Facebook for all my latest recipes and content. And if you’re curious, here are my favorite kitchen gadgets that I use to cook these recipes.
Fermented Okra with Dill
Ingredients
Salt Brine
- 2 cups filtered water
- 4 tsp coarse kosher salt
Okra
- 1 tsp whole peppercorns black peppercorns or a variety
- 1 handful fresh dill on the stem, uncut I've also made with 2 tsp freeze-dried dill
- 14-18 whole okra (do not cut the stem off the okra!)
- 4 cloves fresh garlic smashed with the side of your knife
Instructions
- First make your salt brine by adding the salt to the water and stir until dissolved completely. Set aside. No need to make boiling water for this recipe.
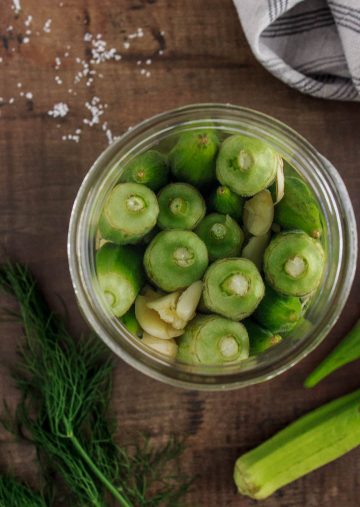
- Now let's compile the jar. Put the peppercorns in the bottom of your clean jar and lay the stems of dill flat on top. It's best to use whole, uncut dill stems and leaves rather than chopping them up. This will avoid little pieces floating to the top. Curve the long dill stems around on themselves so they sit on the bottom of the jar.
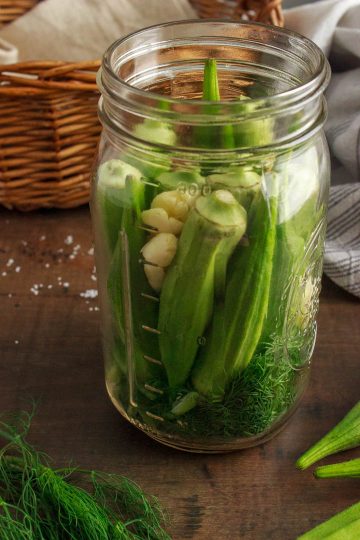
- Next, arrange the uncut okra vertically in the glass jar on top of the dill and peppercorns. To make maximum use of the space, I alternate – wide end up, wide end down, wide end up…. – as I slide the okra in, side by side. Keep filling the jar with okra until there isn't any more room. A tight pack will help keep the okra from floating up above your brine.

- Next, snuggle your garlic cloves down between the stalks of okra. Use your index finger to press them down so they stay put.
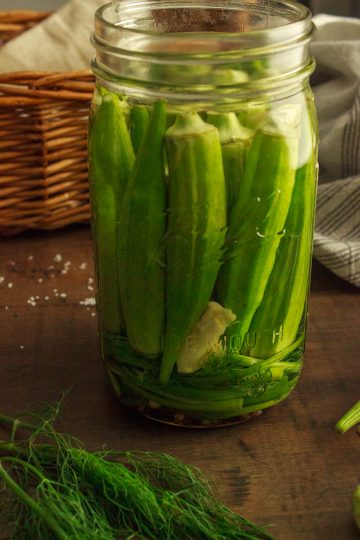
- Pour your salt water brine over top of the garlic, dill, okra mixture. Ensure that the top of the okra is completely covered by the brine.Leave an inch of air space at the top of the jar to give the liquid room to rise and fall as the okra ferments. That said, I often have much less space at the top of the jar and it all turns out fine. If needed, make a little extra brine in the same ratio, and add that to your jar.
- The okra will be quite tightly packed in there so you may not need a weight to hold them below the salt water brine. If not, please apply a weight to keep those ingredients below the brine. If you have a special fermenting lid, put it on now. If not, then loosely cover the jar with cheesecloth or something else that will let the carbon dioxide escape as your okra ferments.
- Leave the jar on your counter, out of direct sunlight, for 4 to 10 days depending on taste. When it's done, put on a lid and move to your refrigerator to enjoy over the next month or two.
Notes
If you like this fermented okra recipe, you can also ferment green beans in the same way. They are called Dilly Beans and I make them often – at some point I’m going to post that recipe on this website as well!


Can you reuse the leftover brine to ferment more okra?
I have not tried reusing brine. My guess is that doing so will change the outcome, so I don’t recommend it with this recipe. But, according to this Reddit thread, some people do reuse their brine. BTW you can drink the brine and it’s very healthy.
Thank you!
I think you can use some old brine in some new to kick start it.
Love the okra! Thanks. Are you willing to link your salsa recipe?
Hi Chris. I’m glad to hear that! If you made my okra I’d love if you could edit your comment to check off the stars for a 5 star review. Regarding my fermented salsa recipe – I haven’t posted it publicly yet and it’s not at the point of testing where I would, unfortunately. Thank you for the reminder though – tomatoes will be in season soon and I should work on getting that publish-worthy.
I’ve had a jar of this okra fermenting on my counter for 8 days and tasted one today – it’s delicious!!! My wife and I love okra AND dill pickles so I expect this will become a regular staple around here. Thanks for the recipe and tips!
Hi Pete – I’m happy to hear this recipe was a 5-star experience for you! Keep enjoying those okra and thanks for trying my recipe. 🙂
I’m confused, you say not to trim the stem off, but in the picture I dont see the stem. How much of the stem should be on the okra?
Hi Debbie – the stem is there in the photos, it’s just very short (almost a nub on some of them). I leave whatever amount of stem came on the okra and it’s usually not much. I should have been more clear and will think on how I can update that part of the directions.
Wow! I fermented okra exactly like you suggested…left on my counter for 7 days and it was so good!! I’m a dill pickle fanatic and it’s possible I like these more than dill pickles!
I also prefer dill okra over dill pickles 🙂 Thanks for the 5-star rating Cassidy!
These were delicious and crunchy, I will definitely make again! You’re right, it’s like a pickle in okra form.
I’m happy to hear this Natasha! Thank you for sharing. 🙂